Very recently I decided I would try making an American India Pale Ale (IPA). My main reason with choosing this type of beer is that it’s one of my favourite styles, and I have a lot of great memories sitting around drinking a really hoppy beer amongst friends.
I decided when I was in Europe that the first method for all-grain brewing I would attempt when I returned back home would be Brew In A Bag (BIAB). Basically you use a big-ass nylon bag to hold all your grains and have your brew kettle do double-duty as a mash tun as well. This method was apparently started by Australian home-brewers as a method to save both time and equipment.
The downside to this method is that you often need a fairly large brew kettle to account for all the water and the grains.
Design
I used BeerSmith2 to do the design for this batch, but unfortunately during the process of setting the software up on another computer, the original recipe file was wiped clean and I lost that information. From memory though it had a starting gravity of 1.066, a final gravity of 1.014, and a colour of roughly SRM 13.

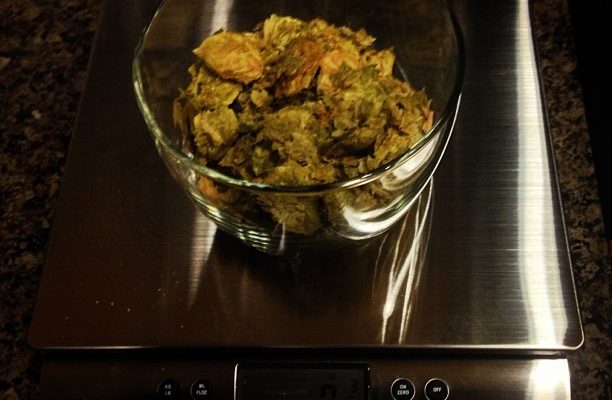
Columbus Hops
The hops during the boil were Cascade, Columbus, and Simcoe, and the dry hop varieties were Willamette and Amarillo. I was shooting for a bitterness rating of around 62 IBU I believe.
For Yeast I decided on something basic: Wyeast 1056 (American Ale). I found the weird Wyeast blister pack to be sort of strange, but I managed to figure it out eventually. I made a small 1L starter for this batch about 24 hours before. I’ve since read that many people ferment starters even longer, up to 5 days or so, so I’ll definitely do a longer one next time.
Notes
I brewed this one out of my patio using a 10G brew kettle on a propane burner. The process went fairly smoothly until it came time to remove the bag that the grains were in at the end of the mash. I didn’t realize it but the bag had become hooked on the built-in temperature probe in the brew kettle. As I lifted the bag out my desire for beer was apparently so strong that I managed to rip open the side of the bag, ultimately causing about 1lb worth of grain to dump into the wort. It wasn’t a huge deal as I just transferred it to another container via a filter and removed most of the grain prior to the boil, but it did cost me a pretty nice brew-bag as well as 15 minutes worth of extra time.
Unfortunately in the apartment I am in there aren’t really any faucets around that I could modify with a hose-adapter. That makes the use of a wort-chiller really difficult. What I ended up doing is filling up a cooler with cold water and then adding a pile of ice cubes to it. I picked up a $50 pond pump down at Canadian Tire and then fabricated a wort chiller from 50 feet worth of copper tubing from Home Depot and a few 3/8″ cables. I connected the wort chiller to the output from the pump and submerged it into the cooler. Using this setup I was able to take the wort from near boiling down to about 78F in 30 minutes or so. I had to drain the cooler once and add new cold water, which involved me carrying a heavy cooler of water through my apartment out to the patio again (not very fun). I also had to basically empty the ice-maker on my fridge to get enough ice to chill the cooler. This part of the process was pretty sketchy, and it definitely needs some rethinking for future batches. I’ve been considering adding a tee connector onto my washing-machine so that I can connect a hose to it, but meddling with water supplies in an expensive apartment complex is a bit scary.
Ultimately I ended up doing a 60 minute BIAB ‘mash’ for this batch and followed up it with a 90 minutes boil. Based on sites I’ve read since, the mash was probably a bit too short to get maximum BIAB efficiency, and the boil may have been a tad long (I’ll probably go to a 75 minute boil later).
I decided to turn my laundry room into my main fermenter area. Unfortunately it turned out to be one of the warmest places in my apartment, and the carboy quickly hit 74F. The workable range for the Wyeast 1056 yeast is up to 70F, so I decided to try and cool it off. I did this but putting it into a bigger bucket filled with ice-water for about an hour, which brought it down to about 69F. Later I moved it into my spare bedroom, which is now basically my brew-house. The main advantage of the bedroom is that it has a large closet, as well as a window I can open to cool the room down (since it’s winter and pretty cold outside). The temperature of the carboy was around 68F for the rest of the fermentation.

Fermenting away in a 6G carboy
After a week the FG stabilized at 1.014, so I transferred it to my 5G carboy along with 2oz of hop pellets (Willamette and Amarillo). I originally tried using a nylon bag, but it quickly got jammed up on the way down so I just abandoned that idea and dumped the pellets in directly (assuming they would simply drop out over time in the fermenter). I’ve been told that many people simply use a primary fermenter these days and most don’t use a secondary, but for my first area it seemed like a good way to maximize my chances of having a clearer beer at the end.

4 days after dry-hopping with Amarillo and Willamette
Ingredients
| Amount | Malt Type |
|---|---|
| 11 lbs | 2-Row Pale |
| 1 lb | Crystal 60L |
| 8 oz | Crystal 30L |
| 8 oz | Crystal 120L |
| 8 oz | Carapils/Dextrine malt |
That’s quite a bit of crystal malt for an IPA, and I’ve found some references to lots of crystal malt ultimately becoming sweet or cloying. In the future I’ll try a batch with less.
Results
This was one of the first brews that I had attempted, so I didn’t really have huge expectations for it. After I made it I found that many people recommended against using this much crystal malt as it tends to dominate the flavour.
After two weeks I decided to crack a bottle and taste it. It was still pretty young tasting, and the carbonation was still pretty weak, but it was definitely a drinkable India Pale Ale. I was sick at the time so I couldn’t smell the aromas, but I’ll take another taste in a few weeks and see where it’s at.

Leave a Reply