As I mentioned in my last blog entry, the other day I had a chance to photography my first wedding. All in all, it was a pretty rewarding experience.
The day started at around 11am for me and Hesty. We suited up, did some last minute charging of equipment, and then got in touch with the groom. Normally the photographer heads over to the where the bride is getting ready for some photos, but Kim’s aunt wanted to do those ones, so I was relieved of that duty.
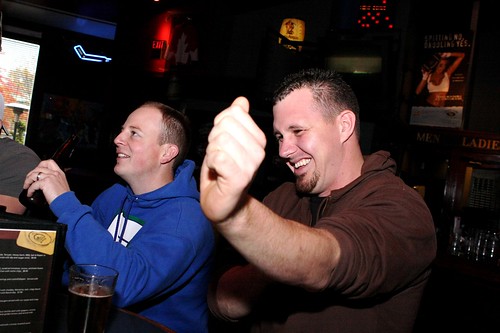
We met Mike and the groomsmen down at the Holiday Inn in Langley to get ready. In true Chilliwack style, Mike, instead of hopping in the shower and putting his tux on, convinced everyone to head across the street to get a few beers. So, we started the day in the Shark Club, drinking beer with some old friends.
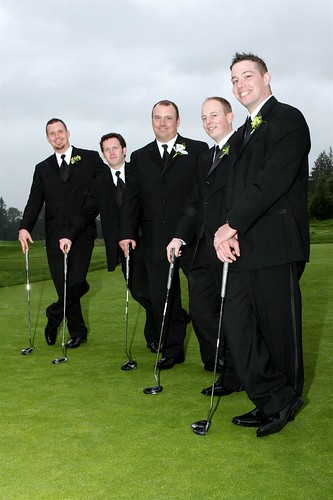
After the groomsmen were suited up, Hesty and I headed down to the golf course for the main photo shots of the day. Unfortunately, the weather was pretty dismal. The rain was coming down hard, and the sky was filled with dark clouds. Originally the wedding ceremony was scheduled to be outside (in fact, the rehearsal the night before was only done outside), but with the poor weather it had to be moved inside under the tent.
I did a few tests and realized it would be next to impossible to photograph anything inside without a flash, so I had prepped my two camera bodies with speedlights and got ready to go. On my main camera, I had my 24-70mm f/2.8L (which was the workhorse I used 90% of the time during the day), and on my backup I had a 10-22mm lens for wide angle shots.

After talking to a few wedding photographers over the last few weeks, every one of them basically said you should have a flash bracket before attempting to shoot a wedding. A flash bracket lifts the light source up about 12 inches or so, which causes the shadows from the flash to be angled downwards and usually out of sight. Unfortunately, while playing with my setup on a flash bracket the night before, I realized I just couldn’t pull it off comfortably. I made a decision to ditch the bracket and just rely on bouncing for most of the shots (which ultimately wasn’t a bad decision).
I know a few photographers that can have two camera bodies on the go at all times. I found it fairly hard to wear two cameras and switch between them. I ended up leaving my backup a few feet away on the ground, and simply used my main camera most of the time.
Surprisingly, I wasn’t very nervous during the day. Once I had taken a few photos, the rest of the day went along fairly easily. The only part of the day I was really worried about were the formals. Thankfully, most people had a fairly good idea of the shots they wanted, and we managed to get through them all in about an hour. Most of the areas we had scoped out for shots the night before were sopping wet and muddy during the wedding, so we had to improvise in a few areas on the golf course.
I’m not normally a big fan of flash. The light from a flash is generally harsh, and it takes a lot of fiddling to make it so a flash photo doesn’t look completely unnatural. I ran into a few problems with my flash during the day, mostly because of low light (which made it difficult not to get dark backgrounds).
There’s a custom function on the Canon cameras which switches the sync speed in Av mode from automatic to 1/250s (or whatever the sync speed is on your camera body). Normally you leave it in automatic so that the background is properly exposed, followed by a flash fire which properly exposes the foreground. Unfortunately, I was having a hard time outside getting the backgrounds to be properly exposed, mainly due to the lack of light from the clouds and trees. It’s a fairly bad idea to shoot in 1600 or 3200 for a wedding, simply because the prints will end up being pretty grainy. I was forced to use 1600 a few times, but made a conscious decision before the wedding not to touch 3200 at all (since even after a pile of post-processing it still looks grainy usually).
I had to switch to use 1/250s sync time in Av a few times just to make sure I got the shot. Putting the camera into this mode is alot like shooting in P, except you have control over the aperture.
Another problem I had was that the flash seemed to be rather inconsistent during the day with properly exposing subjects. Because I had my histogram on 100% of the time, I managed to catch most of these problems as they occurred, and corrected with flash exposure compensation. However, it was a big pain in the ass having to readjust the flash for every new scene.
I hadn’t experienced that particular problem with a flash unit before, so when I got to my dad’s house last night I spent a lot of time reading and trying to figure out why. After a few hours of reading, I think I figured it out. On my particular camera, there are 9 auto focus points which are user selectable using a little joystick on the back. The idea behind this is that once you frame a shot, you can select (using the joystick) the focus point you want to use and then press the shutter button to take the shot. I’ve never been a big fan of doing that though, since I don’t find that the focus is accurate enough for me. Instead, I have always set my focus point to be the middle, and have used the old “focus, recompose, shoot” style of shooting (which can be down by locking the focus on a subject, then recomposing the shot prior to hitting the shutter release).
Unfortunately, it turns out that Canon uses the active focus point for determining the proper exposure. So, after recomposing my shot, the active focus point was sometimes in a weird spot (like over someone’s tux, or sitting on a field). The flash then tried to adjust the output to make that point look proper, which sometimes resulted in my actual subject looking under or over exposed.
So in the future, I either have to use the flash exposure lock button before recomposing (which adds another step and a pre-flash to the workflow), or I have to give up my current technique for focusing. I’m not sure what route I’ll go yet. To get amazing portraits, I’ve always been told the secret is to focus on the eyes, since that’s what generally draws people into the photo. However, it’s hard to do that using the 9 point auto focus system. Granted, if the depth of field is large enough, then it really shouldn’t matter, and focusing on the face is sufficient, but it’s something I’ve gotten used to doing and it’s going to be hard to change.
All in all, I think I did an ok job, and I’d definitely shoot another wedding sometime in the future. For those of you balking at paying $1500 or more for a photographer, let me tell you this — it’s a lot of work, a lot of stress, and requires a ton of knowledge as well as good equipment (which ultimately needs to be replaced every few years). I had a lot of people come up to me with horror stories about paying $2000 for a wedding photographer, only to be extremely unhappy with all the photos they took. So make sure when you’re picking out a photographer that you understand what they are going to do, and are comfortable with their style. As a photographer, make sure you understand the bride and groom’s expectations and are comfortable you can live up to them.
As for me, I had a lot of fun, and learned a few good lessons. I think I’m going to take my flash bracket back and order a different style one, since the one I have is fairly awkward to use. I spent four hours last night post processing photos and am only half-way, so I’m hoping to plow through the rest tonight.

[…] Duane Storey wrote a fantastic post today on “Photographing a Wedding”Here’s ONLY a quick extractOriginally the wedding ceremony was scheduled to be outside (in fact, the rehearsal the night before was only done outside), but with the poor weather it had to be moved inside under the tent. I did a few tests and realized it would be … […]
[…] the blogs, my pal Duane has taken on a different kind of photography. Check out his work in his recap blog post after shooting his first ever […]
Pics look fantastic!!!! Can’t wait to see more!