Yesterday, after dropping Boris off at his place so that he could get ready to go to Spain, I went down to Broadway Camera to see if I could play around with a Canon EOS 40D camera. I had called the day before to see if I could actually purchase one, but unfortunately they said they were already completely sold out.
So imagine my surprise when, after asking if they had any in stock (which was basically a rhetorical question for me), they said “yeah, we have one here.” Unfortunately for me it was the box that contained the kit-lens, when I really wanted to just purchase the body only. The lens in the kit is a 17-85mm f/4.5-5.6 USM IS lens, which is pretty much the EF-S equivalent of the EF 28-135mm IS lens that is super popular. So, while I really have no use for that lens, I decided I would buy it and possible sell it on eBay (it’s only $300 to get it in the kit, but if you were to purchase it outside of the kit it’s around $800).

The Canon EOS 40D is a fairly major improvement over the 20D that I’ve had for nearly three years. The body is a bit larger, and contains partial weather sealing. It has a larger LCD (3″ as opposed to 1.8″), shoots 6.5 frames per second, and has the ISO in the viewfinder (which is pretty much mandatory in my mind, since I mess with ISO continuously).
Anothering interesting improvement is a new “AUTO ISO” ISO setting where the camera will help with ISO settings. Normally, when you move away from the AUTO mode on the camera dial, you are then responsible, as a photographer, for adjusting the ISO. It’s an added step in the decision making process that for me at least is more of an after thought. That is, normally I’ll decide how I want to shoot a shot, and on what aperture etc, and then adjust the ISO to make sure I can hand hold it without camera-shake. The new AUTO ISO mode basically makes the camera take over that step now on all P, Av and Tv modes. Will I use it? I’m not sure, but I’m definitely going to messa round with it.
While I’m on the topic of ISO, I want to point people towards the Noise Ninja photoshop plugin, which I use rather frequently in my post processing. Noise Ninja will analyze a photo for noise (digital or JPEG) and then go to work at removing as much as it as it can. For me, this has made ISO 3200 completely usable, whereas before I probably wouldn’t post a ISO 3200 photo due to the abrasive nature of the noise. If I were to guess, I would say it probably removes about 2 stops of ISO noise from my photos. That is, an ISO 3200 shot will look more like ISO 800 after the whole process. The trade off is sharpness, since Noise Ninja ends up making the image look slightly soft. But you can always sharpen it after processing, or just live with the fact that it’s a bit soft (which for wedding photos, is sometimes nice).
I messed around with the new lens when I got home, and to be honest, it’s pretty decent. Given that the rest of my kit primarily consists of Canon L-series lenses, the kit lens is obviously a step down, but I think it’s a fairly good zoom lens for someone just starting out or wanting to mess around with it.
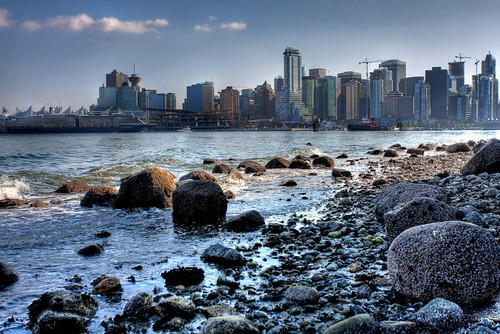
Later in the day, I went down to the beach by Stanley Park with my sister, brother-in-law, niece and my nephew. I haven’t seen them in quite some time, so we had a really nice visit and got to play in the rocks a bit. I also fired off a few hundred shots using my flash to get used to varying lighting conditions outside and to get some practice using flash photography. I’m going to try and mix it up between flash and non-flash at the wedding coming up, but I personally feel like I need to be good with a flash should I encounter a situation where a shot would otherwise be impossible without one.
Once I get my insurance money for my broken lens, I will be buying either the 70-200mm f/2.8L or the IS version (I’m still on the fence). After that, I’m going to have a fairly impressive kit, in my opinion, consisting of the following:
- Canon EOS 40D 10.1 MP Digital SLR
- Canon EOS 20D 8.2 MP Digital SLR – my backup
- Canon ELAN 7 Film SLR body – my full frame workhorse
- Canon EF 24-70mm f/2.8L USM lens
- Canon EF 70-200mm f/2.8L USM lens
- Canon EF 17-40mm f/4.0L USM lens
- Canon EF 50mm f/1.4 USM lens
Which is pretty respectable I would think. I plan to leave my wide-angle lens on my film body most of the time, since wide-angle on a 1.6x crop factor body isn’t really possible without an EF-S lens. In terms of film, I haven’t really had much experience with my film body (although I feel comfortable using it). I’ve pretty much come to the conclusion that I don’t really understand the purpose of black and white film, considering I post-process almost everything, including film (after scanning it digitally). I’ve been told you get cool contrast with B & W film, and more detail etc, but I’ve never really noticed a different. Plus, I think having black and white film stuck in your camera body is a bit limiting should you not finish it off during one sitting. I also think the B & W setting on most digital cameras is rather pointless too, since it’s fairly easy to convert a photo to B & W after the fact (and usually better than the camera can do itself — see the channel mixer in photoshop) without losing the ability to use a photo as colour should you want to.
For the wedding, based on what people have been saying, I’ll probably be using Kodak Portra film on the wide-angle body, and most likely the vivid colour version (since it seems to fit how I feel about photography). I have a few rolls here, and I’m going to go out and shoot one or two before just to get a handle on how it performs.
In terms of the 40D, so far it’s lived up to my expectations. The controls are similar enough to the 20D that I don’t feel uncomfortable using it. There’s a new feature on it that hasn’t gotten much press called Highlight Tone Priority Mode. When enabled, the camera has some secret sauce enabled the preserves highlights at all costs. This is important, for example, at a wedding where the bride’s dress reflects a lot of white. A typical camera on normal settings might cause the dress to be overexposed, and hence would lose most of the detail in the fabric. Most photographers know that when in doubt, you should underexpose, since you can usually recover detail in the shadows, but detail lost to overexposure is gone for good.
How it works is slightly a mystery, but the documentation says it will cost you an ISO stop. So, instead of having a range from 100-1600 ISO, it will limit the range to ISO 200-1600. Some people theorize that the camera bumps up the ISO, then purposefully underexposes in this mode, and finally applies a modified tone-curve after the fact to preserve the highlight detail. I saw a few sample photos on the net that looked fairly impressive, showing obvious detail that was lost with HTP on between test photos. I don’t think it’s anything you can’t do yourself, but in a pinch on a sunny day, it might be a good idea to turn on and err on the side of caution.
Another nice improvement is in frames per second. My 20D could do 5fps, but the 40D can do 6.5fps. While I’ve never really used that to capture something like a sporting event (although I guess I could), it does come in handy doing HDR shots (since I’ve been hand holding most of mine). So, with the 40D, the time required for me to auto-bracket 3 shots is reduced, which should make for clearer HDR with fewer motion artifacts.

Great personal review. I intend to buy the 40D soon with the kit lens (which according to amazon is the 28-135mm) since I am just starting out on my DSLR journey.
Wish me luck!
Ahh if I only had the money to buy a new camera 😉 Though I would think the 40d is a bit much for me, I’ve been using the 350d and the kit lens, though I would like to pick up a decent telephoto lens.
Nice review though!